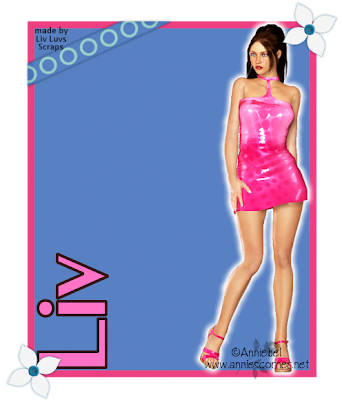
This tutorial was written by Livia @ Liv Luvs Scraps on March 14, 2009 and is my own creation. Any resemblance to another tutorial is a coincidence! DO NOT take anything from this site and claim it as your own, including my ideas. Anything you create from this tutorial is yours, as long as you don’t make any money out of it. Please remember to only use images/tubes that you hold a license to, or are free for personal use. (Check an artist’s TOU before using their work!)
Supplies you’ll need:
Tube of choice – I’m using a tube from
Annies Tubes – (for reference, the image is PPT 018).
Scrap kit of choice – I’m using
Designs By Helly’s Hard Rock Mama kit, which may be purchased
here Filter: Eye Candy 5: Impact (or 4000) – Gradient Glow (optional)
Font of choice – I used Biometric Joe (free font, found at
dafont)
REMEMBER…Save your work often!!!
I will be refering to specific elements from the kit I’ve used, so if you aren’t using the same kit, use the elements you like from your kit of choice. At the bottom of this page, I’ve included an example using one of my own kits, to see that you can make this tag with any kit of your choosing. :)This tutorial assumes you have knowledge of Paint Shop Pro and its features.Open up a 600x600 blank canvas – you can resize it later.
Open up the tube you will be using, duplicate it, and close the original (so you don’t lose it!)...paste it as a new layer on your canvas and resize as you see fit.
Open up a paper of choice. I have used paper 10 from Hard Rock Mama. Paste this as a new layer under your tube. This will be your ‘frame’ for the tube.
Leaving plenty of room around the tube, select a rectangle, invert and delete.
On this same layer, go to selections/select all/float and selections/defloat, so you now have the little marching ants around your paper. Now, Selections/Modify/Contract by 10.
Open up another paper of choice. This time, I’ve used paper 12 from Hard Rock Mama. Copy it, and go back to your canvas.
As a New Raster Layer, paste into selection. So, the order of your elements should be first paper (frame), second paper (fill) and tube on top.
**If you’re using Eye Candy’s Gradient Glow** Click on your tube layer. Go to your plugins and find Gradient Glow in your Eye Candy folder.
If you have EC 5: Impact, you can use the ‘Subtle White Glow with Distortion’ setting, and change the Glow Radius to 12.78.
If you don’t have EC 5, you can use a thin white glow – radius approx. 13, soft corners 35, opacity 100.Time to add embellishments!!
Firstly, something for the bottom-left & top-right corners. I used Star1 from Hard Rock Mama, and resized it to 30%. Add a drop shadow of your choice. (I did V&H 0, Opacity 50, Blur 50, colour black.) Repeat for opposite corner.
Next, add an embellishment to the top left of your tag (doesn’t have to be in the corner!). I used the Silver Charm from H.R.M. and kept it at 100%. Add a drop shadow.
If your embellishment looks like it’s sort-of hanging off nothing, you can add a brad or fixture of some sort. (I used the Fabric Flower from H.R.M.) Again, add a drop shadow.
It’s now time to add your name. Open your font of choice and minimise it (if you haven’t got it in your font folder – if you do, don’t worry about it! LOL)
With a dark colour from your tube as your foreground and a lighter colour from your tube as your background colour, and with a stoke width of 4, type your name and change the size as desired.
Rotate your text 90 degrees to the right, and place it on the right hand side of your tag. I’ve aligned it so that the bottom of most of the letters touches the frame.
Next, add the picture’s copyright & licence info. And, if you want, you can add your ‘made by...’ mark.
Save as a JPG...and that’s it!!