
This tutorial was written by Livia @ Liv Luvs Scraps on July 9, 2009 and is my own creation. Any resemblance to another tutorial is a coincidence! DO NOT take anything from this site and claim it as your own, including my ideas. Anything you create from this tutorial is yours, as long as you don’t make any money out of it. Please remember to only use images/tubes that you hold a license to, or are free for personal use. (Check an artist’s TOU before using their work!)
Supplies you’ll need:
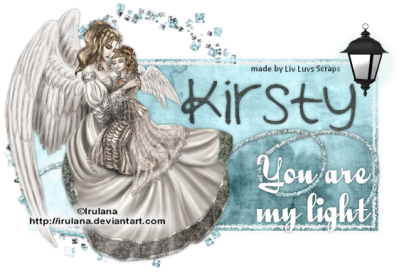
Tube of choice – I’m using a tube from Irulana for the first tag, and one from Popeye Wong for the second tag (at the bottom). CAUTION: Popeye Wong's site contains images of an adult nature. Discretion is advised.
Scrap kit of choice – the kit I’m using is “I Know What You Are” by Kirsty’s Scraps, which may be purchased here.
Filters [OPTIONAL]: * Eye Candy 5 Impact (a pay filter, sorry!) OR Eye Candy 3.1 (now a free filter) – you can find it for free if you search for it on Google :) [Or you can use version 4, if you have it!] You’ll be using the Glow/Gradient Glow filter.
2 fonts of choice (I used Quigley Wiggly by Nick’s Fonts, and Ashley’s Handwriting, which can be found at dafont.com)
REMEMBER…Save your work often!!!
I will be referring to specific elements from the kit I’ve used, so if you aren’t using the same kit, use the elements you like from your kit of choice. At the bottom of this page, I’ve included an example using one of my own kits, to see that you can make this tag with any kit of your choosing. :)
This tutorial assumes you have knowledge of Paint Shop Pro and its features.
Open up a 600x600 canvas – you can resize it later. Fill the canvas with white (for our background).
Now open up the tube you will be using, duplicate it (so you don’t accidently do something to the original!) and close the original. Minimise this – you won’t need it for now.
[If you end up with a square-shaped paper from your mask, you can use the deform tool to make it more rectangular.]
Find another paper from the kit – I used Paper 8. Copy & paste this onto your canvas and move it under the masked layer. Using your selection tool, select the area on this paper that fits inside your masked layer rectangle. (In other words, you’ll have marching ants around the rectangle, but on your paper layer...) Go to Selections/Invert and hit delete. You’ll now only have the second paper showing through the ‘holes’ in the masked layer...man, I am not making any sense, am I? Gee...I hope you get the idea with this! LOL
The next thing I did was found the Glitter Circle in IKWYA, copied it and pasted it onto the canvas, and moved this layer above your ‘white’ bottom layer. If your kit doesn’t have a glitter circle element, you can make your own, or use a doodle element or another mask...completely up to you!!! Resize it if you need to, and move this element to the left of your tag. Add a drop shadow if needed.
Find a curl/doodle element in your kit – I used Doodle1 from IKWYA. Copy & paste it onto your tag and move this layer to the top. Position it a little lower than the centre of your tag. Add a drop shadow of your choice.
Now maximise your tube of choice, copy & paste it onto your tag, resize as needed (I resized it to 70%) and move it to the left of the canvas. Add a drop shadow of choice.
Add an embellishment of your choice to the top right of your tag. I used the Lantern, and resized it to 30%.
Time for your word art - “You Are My Light”. For this, I used Quigley Wiggly at size 48. You can use a colour, gradient, pattern or paper of your choice for this – I made mine plain white. Add a drop shadow to it and move it to the bottom right of your tag.
Open up another paper from your kit of choice (I used Paper 1). Duplicate it and close the original – just in case! LOL
Back to your canvas – change your background fill to the paper you’ve chosen, and have the foreground as nothing. And type in the name (or text) of your choice with whatever font you like. I used Ashley’s Handwriting at size 60. Convert this to a raster layer. Move it to the top of your tag, and place it next to your tube. Add a drop shadow.
Now all you have to do is add the copyright/licensing info, and your watermark!
Crop the canvas if you need to...
Save it as a JPG (or PNG)...and you're done!!!


No comments:
Post a Comment