Showing posts with label tut by Liv. Show all posts

Tuesday, October 13, 2009

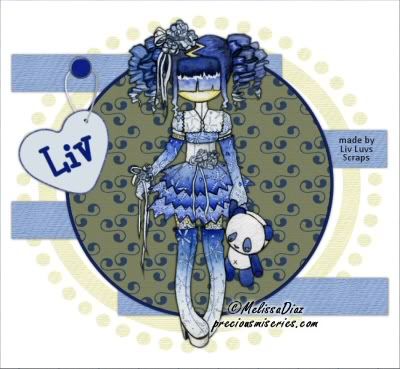
Tutorial: Memories

Memories

This tutorial was written by Livia @ Liv Luvs Scraps on October 13, 2009 and is my own creation. Any resemblance to another tutorial is a coincidence! DO NOT take anything from this site and claim it as your own, including my ideas. Anything you create from this tutorial is yours, as long as you don’t make any money out of it. Please remember to only use images/tubes that you hold a license to, or are free for personal use. (Check an artist’s TOU before using their work!)

Supplies you’ll need:

Tube of choice – I’m using a tube from Anniebel (site currently down) for the first tag, and one from Popeye Wong for the second tag (at the bottom).
CAUTION: Popeye Wong's site contains images of an adult nature. Discretion is advised.

Scrap kit of choice – the kit I’m using is “Nan’s Memories” by Kirsty’s Scraps, which may be purchased here.

Mask of choice – I’m using ‘kelsmask180’ from Ms. Kel – unfortunately, her masks are no longer available on the net...but you can use any mask you like. If you’re using the same kit as I am or a similar kit, a vintage-looking mask will look nice! (In the second tag, I’m using a mask from Creative Desires, which is also not available anymore, unless I haven’t searched the net correctly! LOL)

Filters [OPTIONAL]: * Eye Candy 5 Impact (a pay filter, sorry!) Or you can use version 4, if you have it! You’ll be using the Glow/Gradient Glow filter.

If you’re using either of the Eye Candy’s – you can download the settings I made for this tag here. Or you can use your own! (In the zip, there are 2 files – one is for EC4 [which is the small file] and the other is for EC5 [the larger file]...feel free to use them in your other tags and projects!) Put these in the Gradient Glow folder of your Eye Candy folder, which should be with the rest of your plug-ins & filters.

REMEMBER…Save your work often!!!

I will be referring to specific elements from the kit I’ve used, so if you aren’t using the same kit, use the elements you like from your kit of choice. At the bottom of this page, I’ve included an example using one of my own kits, to see that you can make this tag with any kit of your choosing. :)

This tutorial assumes you have knowledge of Paint Shop Pro and its features.

Open up a 600x600 canvas – you can resize it later. Fill the canvas with white (for our background).

Also open up the tube you’ll be using, duplicate it and close the original – just in case! :)

From your kit of choice, open up a paper that will match your tube. I’m using Paper 10 from “Nan’s Memories”.

Duplicate & close the original.

Copy & paste this paper on your blank canvas.

Go to Layers...Load/Save Mask...Load Mask From Disk (if you have your mask of choice already in your ‘masks’ psp folder)...if you don’t, put it in there now! :)

Choose the mask you want to use. Make sure these are selected: Source Luminance, Fit to Canvas, Hide Mask. Then click ‘Load’.

Merge Group.

Next, choose a ribbon from your kit. I’m using Ribbon 3 from “Nan’s Memories”.

Copy & paste onto your tag, on the layer above your masked paper. Resize if you need to.

We’re going to make the ribbon look like it’s wrapped around the sides of the mask layer.

Firstly, lower the opacity of your ribbon so you can see the mask underneath.

Using your lasso (aka the Freehand Selection Tool), and choosing the ‘Point to Point’ option for ‘Selection Type’, click around the part of the ribbon you want to delete – the part that’s going over the edge of the mask layer.

After you’ve selected this, press ‘delete’ on your keyboard. Hopefully it should sort of look like it’s wrapped around the edge.

Do the same for the other end of the ribbon.

Next, click on your “Lighten/Darken” tool and use these settings:

Shape=circle, size=20, hardness=30, step=2, density=100, thickness=100, rotation=0, opacity=50

Right-clicking (which is the darken tool), go over the ‘wrapping’ edges of your ribbon once...this gives the effect of your ribbon wrapping around the sides! Isn’t that clever?!? LOL

Add a drop shadow of choice to the ribbon.

(For my second tag, my ribbon was thin, so I added a word art embellishment to the layer below the ribbon, and then made it look like the ribbon was wrapped around the word art!)

Choose another embellishment of choice from the scrap kit. I chose the Key from “Nan’s Memories”, and a vinyl record for the second tag.

Place it on the bottom right hand side of your tag. You can either have it on top of or below your ribbon – completely up to you!

Add a drop shadow of choice to this embellishment.

Time for your tube. Resize it, if needed (I think I resized both tubes by about 80%).

Place this toward the left hand side of the tag.

Add a drop shadow of choice to your tube.

Now – time for your text!

Using a colour & font of your choice (I used ‘Freestyle Script’ for both tags either at 90 or 110 in size), type out your text. Convert to raster layer.

Here’s the tricky part... Well, it’s not so tricky anymore, coz I’ve made it simple for ya!!

Open up whichever Eye Candy you’re using; find the ‘Black White Black’ setting (you may have to ‘import’ it into EC...which just means going to ‘Manage’, ‘Import’ then finding the setting), and click ‘OK’...see, told you I made it simple! :)

If you want to, you can add a drop shadow to this text.

All you have to do now is add the copyright/licensing info, and your watermark!

Resize your tag & trim the canvas if you need to...

Save it as a JPG...and you're done!!!

Memories2

Friday, July 10, 2009

Tutorial: My Light

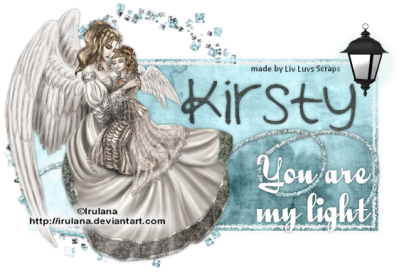
My Light for Kirsty

This tutorial was written by Livia @ Liv Luvs Scraps on July 9, 2009 and is my own creation. Any resemblance to another tutorial is a coincidence! DO NOT take anything from this site and claim it as your own, including my ideas. Anything you create from this tutorial is yours, as long as you don’t make any money out of it. Please remember to only use images/tubes that you hold a license to, or are free for personal use. (Check an artist’s TOU before using their work!)

Supplies you’ll need:

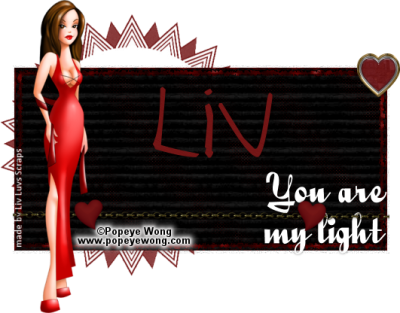
Tube of choice – I’m using a tube from Irulana for the first tag, and one from Popeye Wong for the second tag (at the bottom). CAUTION: Popeye Wong's site contains images of an adult nature. Discretion is advised.

Scrap kit of choice – the kit I’m using is “I Know What You Are” by Kirsty’s Scraps, which may be purchased here.

Filters [OPTIONAL]: * Eye Candy 5 Impact (a pay filter, sorry!) OR Eye Candy 3.1 (now a free filter) – you can find it for free if you search for it on Google :) [Or you can use version 4, if you have it!] You’ll be using the Glow/Gradient Glow filter.

2 fonts of choice (I used Quigley Wiggly by Nick’s Fonts, and Ashley’s Handwriting, which can be found at dafont.com)

REMEMBER…Save your work often!!!

I will be referring to specific elements from the kit I’ve used, so if you aren’t using the same kit, use the elements you like from your kit of choice. At the bottom of this page, I’ve included an example using one of my own kits, to see that you can make this tag with any kit of your choosing. :)

This tutorial assumes you have knowledge of Paint Shop Pro and its features.

Open up a 600x600 canvas – you can resize it later. Fill the canvas with white (for our background).

Now open up the tube you will be using, duplicate it (so you don’t accidently do something to the original!) and close the original. Minimise this – you won’t need it for now.

Open up a paper from your kit – I used Paper 14 from IKWYA. Copy & paste it onto your canvas.

Time to add a mask to this layer...I used a mask called ‘pgd_magical’ – unfortunately, I don’t remember where I got this from... so if you don’t have this mask, you can find one that looks similar. (Eg. Vix PSP has a mask called Vix_Mask196 which would look nice. Also, Ginas Gems Tuts n Such has a nice one – Mask28. Or even Essex Girl’s Fringe Border mask would look nice...or just use whatever mask you like! LOL) Apply the mask, making sure that it looks a little like mine (a thin-ish rectangle with the paper’s pattern showing in the centre...does that make sense? LOL)

[If you end up with a square-shaped paper from your mask, you can use the deform tool to make it more rectangular.]

Find another paper from the kit – I used Paper 8. Copy & paste this onto your canvas and move it under the masked layer. Using your selection tool, select the area on this paper that fits inside your masked layer rectangle. (In other words, you’ll have marching ants around the rectangle, but on your paper layer...) Go to Selections/Invert and hit delete. You’ll now only have the second paper showing through the ‘holes’ in the masked layer...man, I am not making any sense, am I? Gee...I hope you get the idea with this! LOL

The next thing I did was found the Glitter Circle in IKWYA, copied it and pasted it onto the canvas, and moved this layer above your ‘white’ bottom layer. If your kit doesn’t have a glitter circle element, you can make your own, or use a doodle element or another mask...completely up to you!!! Resize it if you need to, and move this element to the left of your tag. Add a drop shadow if needed.

Find a curl/doodle element in your kit – I used Doodle1 from IKWYA. Copy & paste it onto your tag and move this layer to the top. Position it a little lower than the centre of your tag. Add a drop shadow of your choice.

Now maximise your tube of choice, copy & paste it onto your tag, resize as needed (I resized it to 70%) and move it to the left of the canvas. Add a drop shadow of choice.

Add an embellishment of your choice to the top right of your tag. I used the Lantern, and resized it to 30%.

Time for your word art - “You Are My Light”. For this, I used Quigley Wiggly at size 48. You can use a colour, gradient, pattern or paper of your choice for this – I made mine plain white. Add a drop shadow to it and move it to the bottom right of your tag.

Open up another paper from your kit of choice (I used Paper 1). Duplicate it and close the original – just in case! LOL

Back to your canvas – change your background fill to the paper you’ve chosen, and have the foreground as nothing. And type in the name (or text) of your choice with whatever font you like. I used Ashley’s Handwriting at size 60. Convert this to a raster layer. Move it to the top of your tag, and place it next to your tube. Add a drop shadow.

Now all you have to do is add the copyright/licensing info, and your watermark!

Crop the canvas if you need to...

Save it as a JPG (or PNG)...and you're done!!!

My Light

Tuesday, June 9, 2009

Tutorial: You'll Never Know

You'll Never Know

This tutorial was written by Livia @ Liv Luvs Scraps on June 8, 2009 and is my own creation. Any resemblance to another tutorial is a coincidence! DO NOT take anything from this site and claim it as your own, including my ideas. Anything you create from this tutorial is yours, as long as you don’t make any money out of it. Please remember to only use images/tubes that you hold a license to, or are free for personal use. (Check an artist’s TOU before using their work!)

Supplies you’ll need:

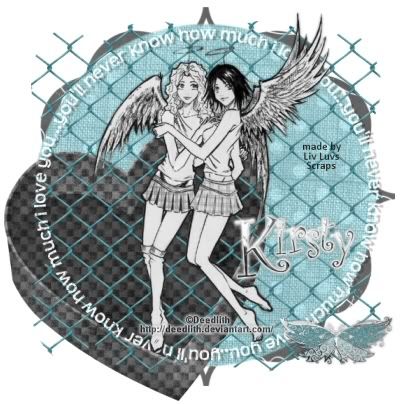
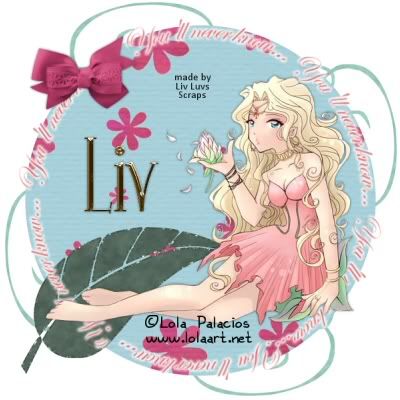
Tube of choice – I’m using a tube from Deedlith for the first tag, and one from Lola Palacios for the second tag (at the bottom).

Scrap kit of choice – the kit I’m using is “I Know What You Are” by Kirsty’s Scraps, which may be purchased here

Filters [OPTIONAL]: * Eye Candy 5 Impact (a pay filter, sorry!) OR Eye Candy 3.1 (now a free filter) – you can find it for free if you search for it on Google :) [Or you can use version 4, if you have it!] You’ll be using the Glow/Gradient Glow filter.

REMEMBER…Save your work often!!!

I will be referring to specific elements from the kit I’ve used, so if you aren’t using the same kit, use the elements you like from your kit of choice. At the bottom of this page, I’ve included an example using one of my own kits, to see that you can make this tag with any kit of your choosing. :)

This tutorial assumes you have knowledge of Paint Shop Pro and its features.

Open up a 600x600 canvas – you can resize it later. Fill the canvas with white (for our background).

Now open up the tube you will be using, duplicate it (so you don’t accidently do something to the original!) and close the original. Minimise this – you won’t need it for now.

Open up a bracket frame from your kit – if your kit of choice doesn’t contain one, you can use a regular frame, make one yourself or use a mask of choice! Totally up to you :) If your kit has a single bracket, you can make it into a ‘frame’ quite easily. Just copy it, mirror it. Then copy the two brackets and rotate by 90 degrees! :)

Copy the frame and paste it on your canvas. It should automatically be centred, but if it isn’t, centre it :) Resize if you need to.

Next, open up a paper of choice from your kit [I’m using Paper 6 from I Know What You Are, which I’ll be calling IKWYA from now on...to simplify things LOL]. Duplicate it and close the original.

On your duplicate paper, draw out a circle with a preset shape (doesn’t matter what colour it is – you’ll only be using it as a template!) Make it big enough to fit on your canvas – if it’s too big, don’t worry because you can resize it! :) Convert this circle to a raster layer.

Now select all (ctrl+a), float (ctrl+f) & defloat (ctrl+shift+f), and you should have those little marching ant things around your circle. Now go to Selections/Invert, click on your paper layer and press the delete button.

Delete the circle template that you made. You should now only have your circle made from your paper of choice. Copy it & paste it on your canvas on the layer above the bracket frame.

Now choose an embellishment of your choice (I chose IKWYA-HeartBox), copy it and paste it as a new layer on your canvas. Move it to the bottom left of your canvas. Resize if you need to.

The next thing I did was open the Chicken Wire embellishment from IKWYA and paste it on my canvas. If your kit has a similar element, you can do the same. If it doesn’t, don’t worry. You can add an overlay of glitter, or another kind of overlay, or leave it blank. Be creative! After all, it’s your tag! :)

The circular wordart is next – I chose the shadowed version in IKWYA.

If your kit doesn’t have any word art like this – don’t worry! Here’s a simple way to make your own:

Open a new canvas the same size as your tag – in this case, 600 x 600. Draw out a circle using your preset shape. Leave it as is (don’t convert it to a raster layer!). Click on the text tool, then put your mouse on the edge of the circle – if you see an ‘A’ with a rounded line underneath it, click. Pick the colour & font of your choice and type your words in. Keep typing until there’s enough to make a circle. Apply your text. Make the circle layer invisible. And merge visible. You now have your own circular word art! In the second tag, I used the script “Edwardian Script” and used a colour from my tube. I also added a gradient glow around it.

Copy & paste it to your tag canvas, and resize if you need to. Add a drop shadow of choice.

If you don’t want a word art, maybe you can make a circular glitter frame, or scatter some flowers or glitter in a circle shape! That might look nice! :)

It’s now time to add your tube to your tag. So open up your duplicate tube that you minimised earlier, copy it & paste it onto your tag. Resize it if you need to. Add a drop shadow of choice.

Pick another embellishment from your kit of choice – I chose IKWYA-Butterfly-1. Copy & paste it onto your canvas, resize it (I resized the butterfly to 40%) and add a drop shadow of choice. Move him to the bottom right of your tag, making sure this is the top layer on your canvas.

Time for your name or word of choice! If your kit has an alpha, great! Use that! I used the alpha from IKWYA, and resized the letters (50% for the upper case, 30% for the lower case).

If your kit doesn’t have an alpha – make your own!! Type the word in a font & colour of your choice and add whatever filters, settings or effects you like! You can make them metallic, glass, bevelled, textured...completely up to you!!

If you want to make your alpha stand out, using Eye Candy (whatever version you have), add a thin glow (aka gradient glow) around them. I used white, but you could use whatever colour you want!

Move your word to the right of your tube, and then add a drop shadow to your word if you like.

Now all you have to do is add the copyright/licensing info, and your watermark!

Trim the canvas if you need to...

Save it as a JPG...and you’re done!!!

You'll Never Know 2

Monday, May 18, 2009

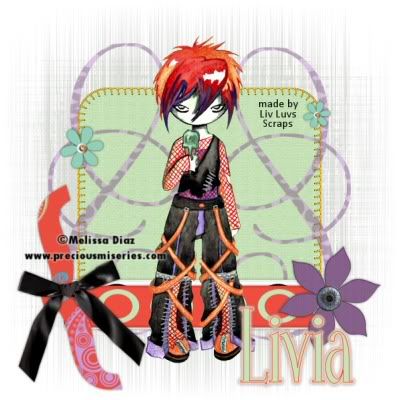
Tutorial: Misfit

Misfit

This tutorial was written by Livia @ Liv Luvs Scraps on May 15, 2009 and is my own creation. Any resemblance to another tutorial is a coincidence! DO NOT take anything from this site and claim it as your own, including my ideas. Anything you create from this tutorial is yours, as long as you don’t make any money out of it. Please remember to only use images/tubes that you hold a license to, or are free for personal use. (Check an artist’s TOU before using their work!)

Supplies you’ll need:

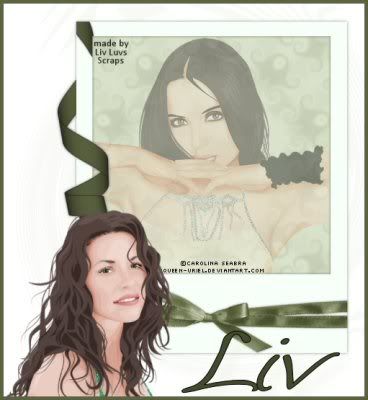
Tube of choice – I’m using a tube from for the first tag Carolina Seabra, and one from Melissa Diaz (@ The Precious Miseries Manor) for the second tag (at the bottom).

Scrap kit of choice – the kit I’m using is “Misfit” by Kirsty’s Scraps, which is a free tagger kit found on her blog!

[No outside filters are needed!!]

Mask of choice – I used one from Creative Desires, which is no longer on the net (I can’t find it anyway!) – if you don’t have any mask from them, there are heaps of great ones at Vix’s PSP [put the mask in your ‘Masks’ folder]

Font of choice – I used BoyzRGross by Nick’s fonts

You will also need my LLS_TagTemp_001-PU template, which you can get from here (zip includes .psp, .pspimage & .psd formats)

REMEMBER…Save your work often!!!

I will be referring to specific elements from the kit I’ve used, so if you aren’t using the same kit, use the elements you like from your kit of choice. At the bottom of this page, I’ve included an example using one of my own kits, to see that you can make this tag with any kit of your choosing. :)

This tutorial assumes you have knowledge of Paint Shop Pro and its features.

Open up my LLS_TagTemp_001 template, duplicate it (so you don’t accidently do something to the original!) and close the original.

Do the same for your tube of choice.

Open up a paper from your kit of choice (I used Paper 2 from “Misfit”). Copy & paste this, moving this layer above the ‘background’ layer of the template.

Go to Layers/ Load/Save Mask / Load mask from disk; make sure these are selected: Source Luminance, Fit to canvas, Hide all mask. Click Load.

Merge group – lower opacity to 30 (or whatever you think would look best for your tag – you can always change it later).

Open up another paper of choice (I used paper 16 from “Misfit”). Copy it.

** Click the ‘stripes’ layer, and paste your paper in a new layer above this one.

Back on your ‘stripes’ layer, go to Selections/Select All (or press Ctrl+a if you’re using a windows computer), then go to Selections/Float (or Ctrl+f), then Selections/Defloat (or Ctrl+Shift+f). Now go to Selections/Invert.

Click on your paper layer above the ‘stripes’ layer. Press Delete.

Add a drop shadow of choice. **

Repeat the above steps (in between the stars [**]) for your back circle & front circle, using different papers. (For the back circle I used glitter 4, and for the front circle I used paper 8, both from “Misfit”.)

Hide the original template layers named ‘stripes’, ‘back circle’ & ‘front circle’.

Copy & paste your tube onto your canvas and move this layer to the top. Add a drop shadow.

Optional step: If the kit you’re using has a circle glitter frame, like the one I used from “Misfit”, you can copy & paste it in a layer on top of your front circle, and add a drop shadow.

It’s time to add your name/text.

Copy & paste an embellishment of your choice from the kit – preferably one that text will look good on (I used Charm-1 from “Misfit”, and added a white background to the inside of the charm, and lowered the opacity to make it look like clouded glass). Move it to one side of your tube. I slightly changed the angle of my charm, so it looks like it’s hanging! :)

Add a drop shadow of choice.

Using a colour from your tube & your choice of font, type your text. If you’ve put your element on an angle, rotate your text the same way.

Now all you have to do is add the copyright/licensing info, and your watermark!

Save it as a JPG...and you're done!!!


Misfit2

Monday, May 11, 2009

Tutorial: Believe In Fairies

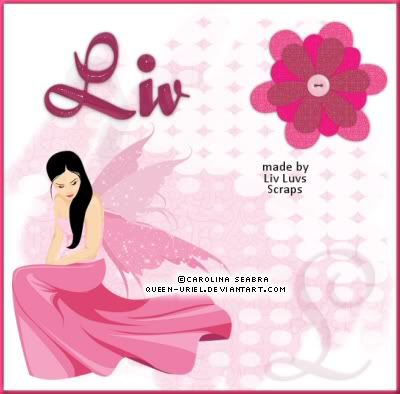
Believe

This tutorial was written by Livia @ Liv Luvs Scraps on May 2, 2009 and is my own creation. Any resemblance to another tutorial is a coincidence! DO NOT take anything from this site and claim it as your own, including my ideas. Anything you create from this tutorial is yours, as long as you don’t make any money out of it. Please remember to only use images/tubes that you hold a license to, or are free for personal use. (Check an artist’s TOU before using their work!)

Supplies you’ll need:

Tube of choice – I’m using a tube from Deedlith for the first tag, and one from Carolina Seabra for the second tag (at the bottom).

Scrap kit of choice – the kit I’m using is “I Do Believe In Faeries” by Kirsty’s Scraps, which may be purchased here

Filters: * Eye Candy 5 Impact (a pay filter, sorry!) OR Eye Candy 3.1 (now a free filter) – you can find it for free if you search for it on Google :)

Glass preset “SK Candy Sticks Shine” by Shawna @ Scrap Stuff With PSP

Mask of choice – I used “183MaskkelsWWA” – if you don’t have this mask, there are heaps of great ones at Vix’s PSP [put the mask in your ‘Masks’ folder]

Font of choice – I used Quigley Wiggley by Nick’s fonts

REMEMBER…Save your work often!!!

I will be referring to specific elements from the kit I’ve used, so if you aren’t using the same kit, use the elements you like from your kit of choice. At the bottom of this page, I’ve included an example using one of my own kits, to see that you can make this tag with any kit of your choosing. :)

This tutorial assumes you have knowledge of Paint Shop Pro and its features.

Open up a 600x600 canvas – you can resize it later. Fill the canvas with white (for our background).

Now open up the tube you will be using, duplicate it (so you don’t accidently do something to the original!) and close the original. Minimise this – you won’t need it for now.

Open up a paper from your kit of choice – I’m using Paper 16 from “I Do Believe In Faeries” (which I will call IDBIF from now on!)

Go to Layers/ Load/Save Mask / Load mask from disk; make sure these are selected: Source Luminance, Fit to canvas, Invert transparency, Hide all mask. Click Load.

Merge group – lower opacity to 20.

Copy & paste your tube onto your canvas – drag this layer under the masked paper layer.

Lower the opacity to 6 (or a very low number of your choice)

Paste the tube, and drag this layer to the top, resize by 70%, and position it at the bottom left of the canvas

Open up an element from your kit of choice (I’ve used Fairy-Tate from IDBIF), resize by 30%, position at top right of the canvas

Crop your canvas to a size you like.

New raster layer, move to top. Select all, Selections/Modify/Contract by 5, invert

Open glitter of choice (I’ve used Glitter-1 from IDBIF), fill the 5 pixel border with glitter as a pattern, scaled at 40. If your kit doesn’t have glitter, you can fill it with a paper or colour of your choice.

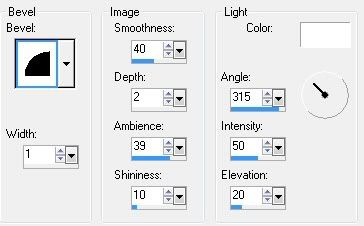
With this border still selected, go to Effects/Inner bevel, and use:

bevel

From your kits’s alpha - open the first letter of the word/name you’ll be typing. Copy & paste, position bottom right, lower opacity to 12.

If your kit doesn’t have an alpha, you can type the first letter using a font of choice, add an inner bevel and lower the opacity to 12.

Using a mid-dark colour from your tube, type in your word/name you’re using.

Using Eye Candy 5 Impact Glass, to the Settings tab, click on Manage/Import then find the “SK Candy Sticks Shine” preset you’ve downloaded as part of the Candy Sticks supplies.

Now you’ll see that the preset has been added to your User settings. Click it, and press ok.

If you don’t have Eye Candy 5, you can use Eye Candy 3.1’s Glass with the Transparent Button preset (in the drop down menu).

Add a drop shadow of choice.

Now all you have to do is add the copyright/licensing info, and your watermark!

Save it as a JPG...and you’re done!!!

Believe2

Sunday, April 19, 2009

Tutorial: Keepsake

Keepsake for Kirsty

This tutorial was written by Livia @ Liv Luvs Scraps on April 19, 2009 and is my own creation. Any resemblance to another tutorial is a coincidence! DO NOT take anything from this site and claim it as your own, including my ideas. Anything you create from this tutorial is yours, as long as you don’t make any money out of it. Please remember to only use images/tubes that you hold a license to, or are free for personal use. (Check an artist’s TOU before using their work!)

Supplies you’ll need:

Tube of choice – I’m using “Green Angel” from Irulana for the first tag, and “Lil’ Punk” from Melissa Diaz for the second tag (at the bottom).

Scrap kit of choice – the kit I’m using is “Keepsake” by Kirsty’s Scraps, which is a free-to-use kit that can be found at Kirsty’s blog.

Filters: * DSB Flux, which can be downloaded from here
* Eye Candy 5 Impact (a pay filter, sorry!) OR Eye Candy 3.1 (now a free filter) – you can find it for free if you search for it on Google :)

Font of choice – I used Echelon by Larabie fonts

REMEMBER…Save your work often!!!

I will be referring to specific elements from the kit I’ve used, so if you aren’t using the same kit, use the elements you like from your kit of choice. At the bottom of this page, I’ve included an example using one of my own kits, to see that you can make this tag with any kit of your choosing. :)

This tutorial assumes you have knowledge of Paint Shop Pro and its features.

Open up a 600x600 canvas – you can resize it later. Fill the canvas with white (for our background).

Open up the tube you will be using, duplicate it and close the original. Minimise it for now.

Open up, copy & paste the Keepsake-Matt on your canvas, duplicate it, hide original and work on copy.

Using DSB Flux – Bubbles – bubbles=21, density=50, frequency=50, tune=50

Now with DSB Flux – Blast - Percentage=49, Direction-Left

Repeat Blast 3 more times but change directions to right, then upwards & then downwards.

Change opacity to 50

Unhide original matt.

Maximise your tube. Copy & paste it onto your canvas, resize if needed, and move this layer to the top.

Open up Keepsake-Lace2 – paste, resize by 70%, move layer under tube, position towards the bottom of tube.

Keepsake-Bracket – Copy & paste it onto your canvas, resize by 70%, rotate to an angle you like, and move to left of lace. Drop shadow

Keepsake-Doodle1 – Copy & paste it onto your canvas, duplicate, mirror –move both layers under lace, add drop shadow

Keepsake-Flower5 – Copy & paste it onto your canvas, resize by 30%, move to right of lace, drop shadow

Keepsake-Dragonfly – Copy & paste it onto your canvas, resize by 30%, position where you like, drop shadow

Keepsake-Dragonfly - Copy & paste it onto your canvas, resize by 20%, position where you like, drop shadow

Open Keepsake-Glitter1

For your text/name- font=Echelon, size=120, foreground=dark colour from glitter, background=glitter

If you have EC5 Impact – Gradient Glow: Glow type=Outside Glow, Mask Selection=(yes), Glow Radius (pixels)=7.00, Soften Corners=35, Overall opacity=100, Distortion amount=30, Distortion lump size=100, Gradient- Smoothness=100, the colour should be a light colour from your tube

If you have Eye Candy 3.1 – Glow: Width (pixels) =7, Opacity=65 (or whatever you feel looks right), Opacity dropoff=medium, color= (a light one from your tube), draw everywhere=(no)

Add a drop shadow of choice.

Now all you have to do is add the copyright/licensing info, and your watermark!

Save it as a JPG...and you're done!!!
Keepsake

Thursday, March 26, 2009

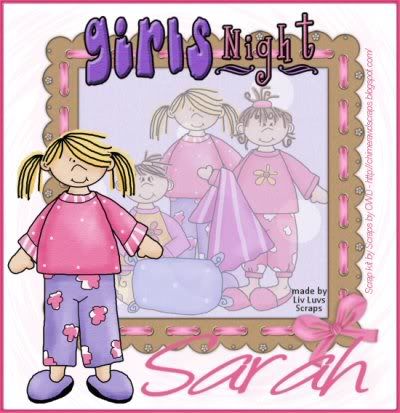
Tutorial: Girls Night

Girls Night

This tutorial was written by Livia @ Liv Luvs Scraps on March 26, 2009 and is my own creation. Any resemblance to another tutorial is a coincidence! DO NOT take anything from this site and claim it as your own, including my ideas. Anything you create from this tutorial is yours, as long as you don’t make any money out of it. Please remember to only use images/tubes that you hold a license to, or are free for personal use. (Check an artist’s TOU before using their work!)

Supplies you’ll need:

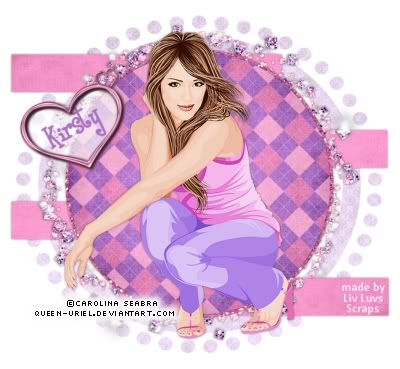
2 Tubes of choice – I’m using 2 tubes from the scrap kit I used for the first tag, and two from Carolina Seabra (aka Queen Uriel) for my second tag.

Scrap kit of choice – I’m using I Sleepovers by Scraps by CWD, which may be purchased from TKO Scraps

Filters: * Filters Unlimited 2.0 (a pay filter, sorry!) If you don’t have it, I will give you an option that will give you a similar effect.
              * Eye Candy 3.1 (now a free filter) – you can find it for free if you search for it on Google :)

Font of choice – I used Angelina, which can be found at dafont

REMEMBER…Save your work often!!!

I will be referring to specific elements from the kit I’ve used, so if you aren’t using the same kit, use the elements you like from your kit of choice. At the bottom of this page, I’ve included an example using one of my own kits, to see that you can make this tag with any kit of your choosing. :)

This tutorial assumes you have knowledge of Paint Shop Pro and its features.

Open up a 600x600 canvas – you can resize it later. Fill the canvas with white (for our background).

Open up the tubes you will be using, duplicate them and close the originals. Minimise them for now.

From your kit of choice, open up a frame you like – I chose the pink frame. If your kit doesn’t have a frame included, you can either make one yourself using a paper, or choose a frame that comes with PSP! :)

Now open up a paper of choice from your kit, duplicate it and close the original.

Go back to your tag canvas. With your magic wand, click inside the frame (where it’s empty), go to Selections/Modify/Expand, and make it either 2 or 3.

Add a new raster layer, and drag this below the frame layer. Go to your paper of choice, copy it, go back to the canvas, and paste into selection.

Now you can add a drop shadow of your choice to the frame.

Pick one of your tubes to go inside the frame. Copy it and paste it on top of the paper layer. Resize the tube so that it fits inside the frame. Lower the opacity of the tube to 40.

Open up another paper of choice from your scrap kit, preferably a mid-dark coloured paper, but you can do whatever you want! :) Duplicate it, and close the original.

With your selection tool, select a rectangle as big as your frame. Copy it.

Back to your canvas - click on your very bottom layer (which should be the white background). Paste your new paper as a new layer.

If you have Filters Unlimited 2.0: Go to Distortion Filters/Twister, and drag the arrow to 94.

If you don’t have Filters Unlimited 2.0: Go to Effects/Distortion Effects/Ripple, and have your settings at Horizontal=100, Vertical=76, Amplitude=63, Wavelength=21, Edge Mode=Wrap.
Now, go to Effects/Distortion Effects/Twirl, and put the setting to 720.

Change the opacity of your ‘twisted’ paper to 4.

It’s time to add your other tube! Copy it, and paste it on your canvas, making sure this layer is on top of all the others. Resize your tube as needed.

Now for your text – using your font of choice, at a size of your choosing (mine is at 90), type your text. Convert to Raster Layer. [I also italicised the font, and stretched it out a bit.]

Go to Eye Candy 3.1/Drop Shadow, and in the dropdown menu, click on Faint. Change the colour to a lighter colour of the text, or leave it as black...up to you!! And accept it! :)

Crop your canvas to a size you like. Add a new raster layer at the top, and fill it with the same colour as your text. (Don’t worry, it won’t stay like this for long! LOL)

Go to Selections/Modify/Contract, and set the number to 5. Delete the selection, then go to Selections/Invert. You will now have your border highlighted. Add a bevel of your choice.

Now all you have to do is add the copyright/licensing info, and your watermark!

Save it as a JPG...and you’re done!!!


Girls Night

Monday, March 16, 2009

Tutorial: HARD ROCK

This tutorial was written by Livia @ Liv Luvs Scraps on March 14, 2009 and is my own creation. Any resemblance to another tutorial is a coincidence! DO NOT take anything from this site and claim it as your own, including my ideas. Anything you create from this tutorial is yours, as long as you don’t make any money out of it. Please remember to only use images/tubes that you hold a license to, or are free for personal use. (Check an artist’s TOU before using their work!)

Supplies you’ll need:

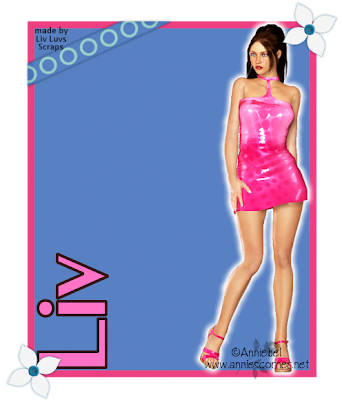
Tube of choice – I’m using a tube from Annies Tubes – (for reference, the image is PPT 018).

Scrap kit of choice – I’m using Designs By Helly’s Hard Rock Mama kit, which may be purchased here

Filter: Eye Candy 5: Impact (or 4000) – Gradient Glow (optional)

Font of choice – I used Biometric Joe (free font, found at dafont)

REMEMBER…Save your work often!!!

I will be refering to specific elements from the kit I’ve used, so if you aren’t using the same kit, use the elements you like from your kit of choice. At the bottom of this page, I’ve included an example using one of my own kits, to see that you can make this tag with any kit of your choosing. :)

This tutorial assumes you have knowledge of Paint Shop Pro and its features.

Open up a 600x600 blank canvas – you can resize it later.

Open up the tube you will be using, duplicate it, and close the original (so you don’t lose it!)...paste it as a new layer on your canvas and resize as you see fit.

Open up a paper of choice. I have used paper 10 from Hard Rock Mama. Paste this as a new layer under your tube. This will be your ‘frame’ for the tube.

Leaving plenty of room around the tube, select a rectangle, invert and delete.

On this same layer, go to selections/select all/float and selections/defloat, so you now have the little marching ants around your paper. Now, Selections/Modify/Contract by 10.

Open up another paper of choice. This time, I’ve used paper 12 from Hard Rock Mama. Copy it, and go back to your canvas.

As a New Raster Layer, paste into selection. So, the order of your elements should be first paper (frame), second paper (fill) and tube on top.

**If you’re using Eye Candy’s Gradient Glow** Click on your tube layer. Go to your plugins and find Gradient Glow in your Eye Candy folder.
If you have EC 5: Impact, you can use the ‘Subtle White Glow with Distortion’ setting, and change the Glow Radius to 12.78.
If you don’t have EC 5, you can use a thin white glow – radius approx. 13, soft corners 35, opacity 100.


Time to add embellishments!!

Firstly, something for the bottom-left & top-right corners. I used Star1 from Hard Rock Mama, and resized it to 30%. Add a drop shadow of your choice. (I did V&H 0, Opacity 50, Blur 50, colour black.) Repeat for opposite corner.

Next, add an embellishment to the top left of your tag (doesn’t have to be in the corner!). I used the Silver Charm from H.R.M. and kept it at 100%. Add a drop shadow.

If your embellishment looks like it’s sort-of hanging off nothing, you can add a brad or fixture of some sort. (I used the Fabric Flower from H.R.M.) Again, add a drop shadow.

It’s now time to add your name. Open your font of choice and minimise it (if you haven’t got it in your font folder – if you do, don’t worry about it! LOL)

With a dark colour from your tube as your foreground and a lighter colour from your tube as your background colour, and with a stoke width of 4, type your name and change the size as desired.

Rotate your text 90 degrees to the right, and place it on the right hand side of your tag. I’ve aligned it so that the bottom of most of the letters touches the frame.

Next, add the picture’s copyright & licence info. And, if you want, you can add your ‘made by...’ mark.

Save as a JPG...and that’s it!!